クリックで飛ばしたRayに反応せずにすり抜けて、その奥にあるオブジェクトに照射できるようにしましょう。
今回の例では、手前にあるCubeを貫通して、向こう側にあるオブジェクトにRayが当たり、回転するようにします。
関連記事:
Rayの始点をマイナスにしてオブジェクトを貫通
手前のオブジェクトにRayを当てない
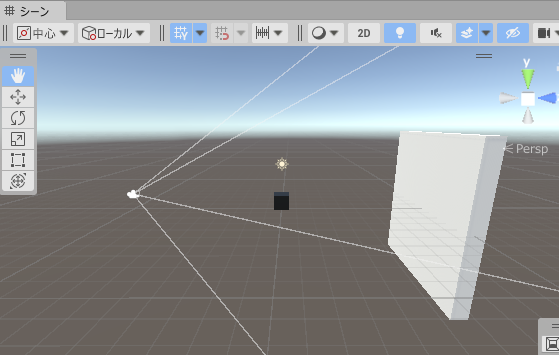
オブジェクトを2個作成し、一つをWall、もう一つはCubeにしています。
Wallは奥のほうに配置し、サイズを変更しました。
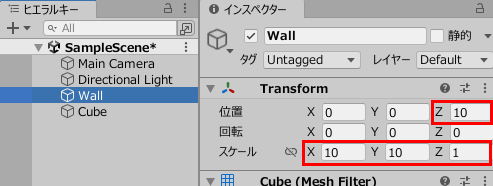
MainCameraから見ると、手前にCube(黒)、奥にWall(白)があります。

空のオブジェクトを作成。
ClickPoint.csを作成し、GameObject(空のオブジェクト)に追加します。
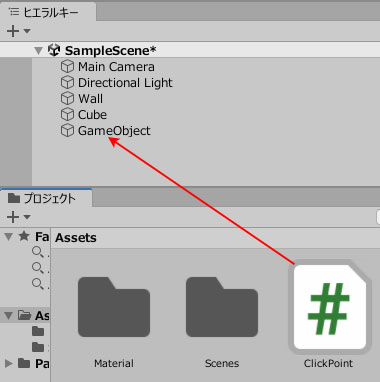
ClickPoint.csを記述します。
|
1 2 3 4 5 6 7 8 9 10 11 12 13 14 15 16 17 18 19 20 21 22 23 24 25 26 27 28 29 30 31 32 33 34 35 36 37 38 |
using System.Collections; using System.Collections.Generic; using UnityEngine; public class ClickPoint : MonoBehaviour { private BoxCollider cubeCol; void Update () { Ray ray = Camera.main.ScreenPointToRay(Input.mousePosition); RaycastHit hit; if (Input.GetMouseButtonDown(0)) { if (Physics.Raycast(ray, out hit)) { if (hit.collider.name == "Cube") { cubeCol = hit.collider.gameObject.GetComponent<BoxCollider>(); cubeCol.enabled = false; } } } if (Input.GetMouseButtonUp(0)) { if (Physics.Raycast(ray, out hit)) { if (hit.collider.name == "Wall") { hit.collider.gameObject.transform.Rotate(0,0,15); cubeCol.enabled = true; } } } } } |
ゲームプレイしてみましょう。
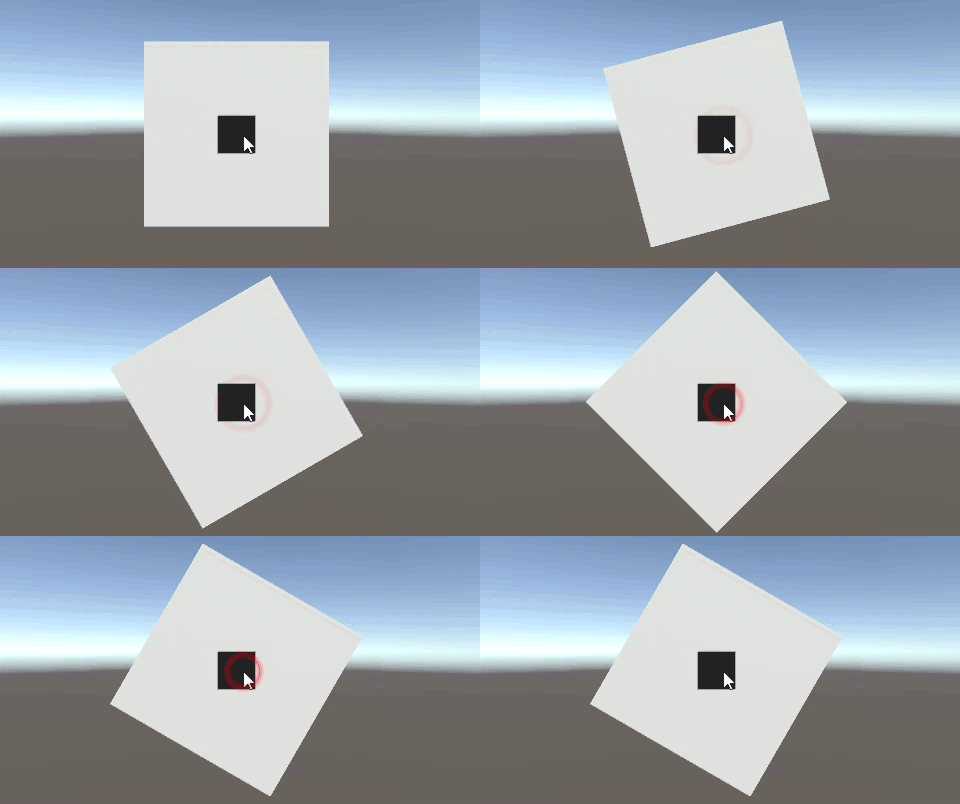
Cube(黒)をクリックしても、Rayはこれを貫通。
背後のWall(白)にRayが当たり、回転します。

GetMouseButtonDownのマウスボタンを押したタイミングで、Rayが当たったCubeのコライダーを無効化。
GetMouseButtonUpのマウスボタンを離したタイミングで、再びRayを出し、Wallを照射して回転します。
関連記事:
Rayの始点をマイナスにしてオブジェクトを貫通


