ボックスタイプのRaycast(光線)を作って飛ばしてみましょう。
通常のRayは線状になっていますが、箱形にすれば、Rayに厚みをもたせることができます。
前方に向けてサイズ1.0の大きさで、5.0離れた場所にRayを出してみます。
関連記事:
球形のRaycastを作る
向いている方向へRaycastを出す
Raycastによる接地判定
左右にRaycastの接触判定をつくる
Raycastの照準に当たれば色が変わる
Raycastによる特定オブジェクトの接触判定
オブジェクトに向けてRaycastを出し続ける
CubeRayの作成
CubeをSphereを作成します。
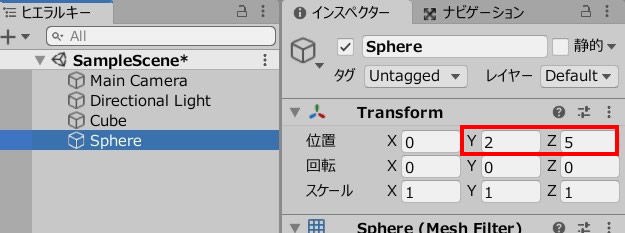
プレーヤーであるSphereの位置を変えます。
CubeRay.csを作成し、Cubeに追加します。
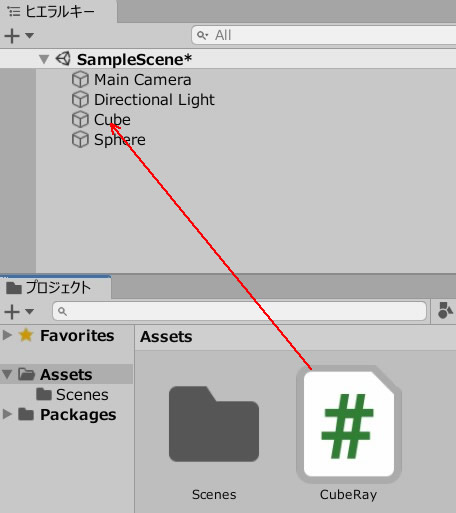
CubeRay.csを記述します。
|
1 2 3 4 5 6 7 8 9 10 11 12 13 14 15 16 17 18 19 20 21 22 23 |
using System.Collections; using System.Collections.Generic; using UnityEngine; public class CubeRay : MonoBehaviour { void Update() { RaycastHit hit; if(Physics.BoxCast(transform.position, new Vector3(1.0f,1.0f,1.0f), transform.forward, out hit, Quaternion.identity, 5.0f,LayerMask.GetMask("Default"))) { Debug.Log(hit.collider.name); } //箱形のRayまでの距離を可視化 Debug.DrawRay(transform.position, transform.forward * 5.0f, Color.red); } //箱形のRayを可視化 void OnDrawGizmos() { Gizmos.color = Color.red; Gizmos.DrawWireCube(transform.position + transform.forward * 5.0f, new Vector3(1.0f,1.0f,1.0f)); } } |
ここで一度、プレイを押してみましょう。
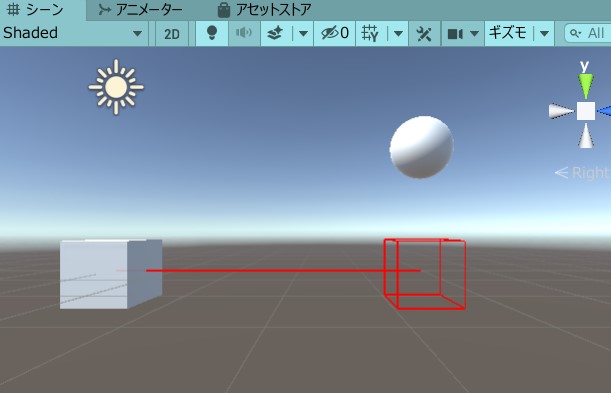
シーンビューを確認してみると、箱形のRaycastが赤線で確認できます。
また、Cubeから箱形Rayまでの距離も、赤線で確認できます。

Physics.BoxCast(ボックスの中心, 各軸についてのボックスサイズの半分, ボックスを照射する方向, hitしたオブジェクトの情報, Raycastの最大の長さ, レイヤーマスク);
DrawWireCube(箱形Rayの中心位置, 箱形Rayのサイズ);
接触判定を確認
続いて、Sphere(プレーヤー)のスクリプトを作成しましょう。
SphereMove.csを作成し、Sphereに追加します。
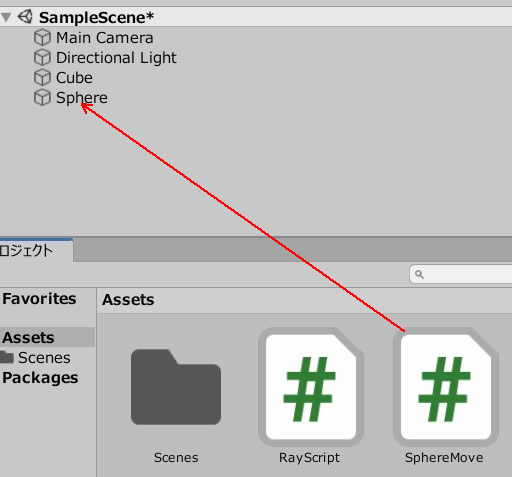
SphereMove.csを記述します。
|
1 2 3 4 5 6 7 8 9 10 11 12 13 14 15 16 17 18 19 20 21 22 23 |
using System.Collections; using System.Collections.Generic; using UnityEngine; public class SphereMove : MonoBehaviour { private float speed; void Start() { speed = 1.0f; } void Update() { if (Input.GetKey (KeyCode.UpArrow)) { transform.position += transform.up * speed * Time.deltaTime; } if (Input.GetKey (KeyCode.DownArrow)) { transform.position -= transform.up * speed * Time.deltaTime; } } } |
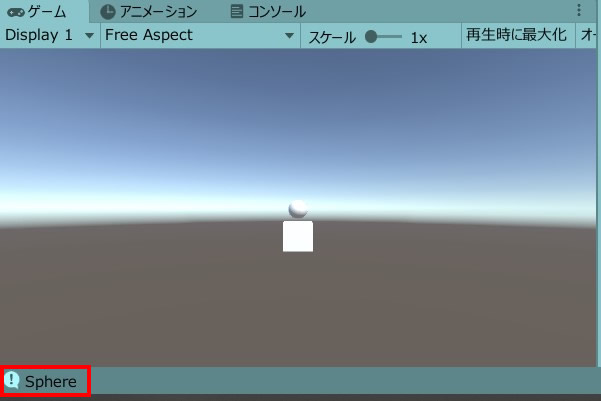
ゲームプレイしてみましょう。
Sphereを操作して、箱形のRayに触れてみると、コンソールにオブジェクト名「Sphere」が表示されます。
関連記事:
球形のRaycastを作る
向いている方向へRaycastを出す
Raycastによる接地判定
左右にRaycastの接触判定をつくる
Raycastの照準に当たれば色が変わる
Raycastによる特定オブジェクトの接触判定
オブジェクトに向けてRaycastを出し続ける


